
How Online Company Stores Work for Your Organization
Learn how online company stores organize employee and member merchandise ordering, and what to decide about products, payment, delivery, and launch.
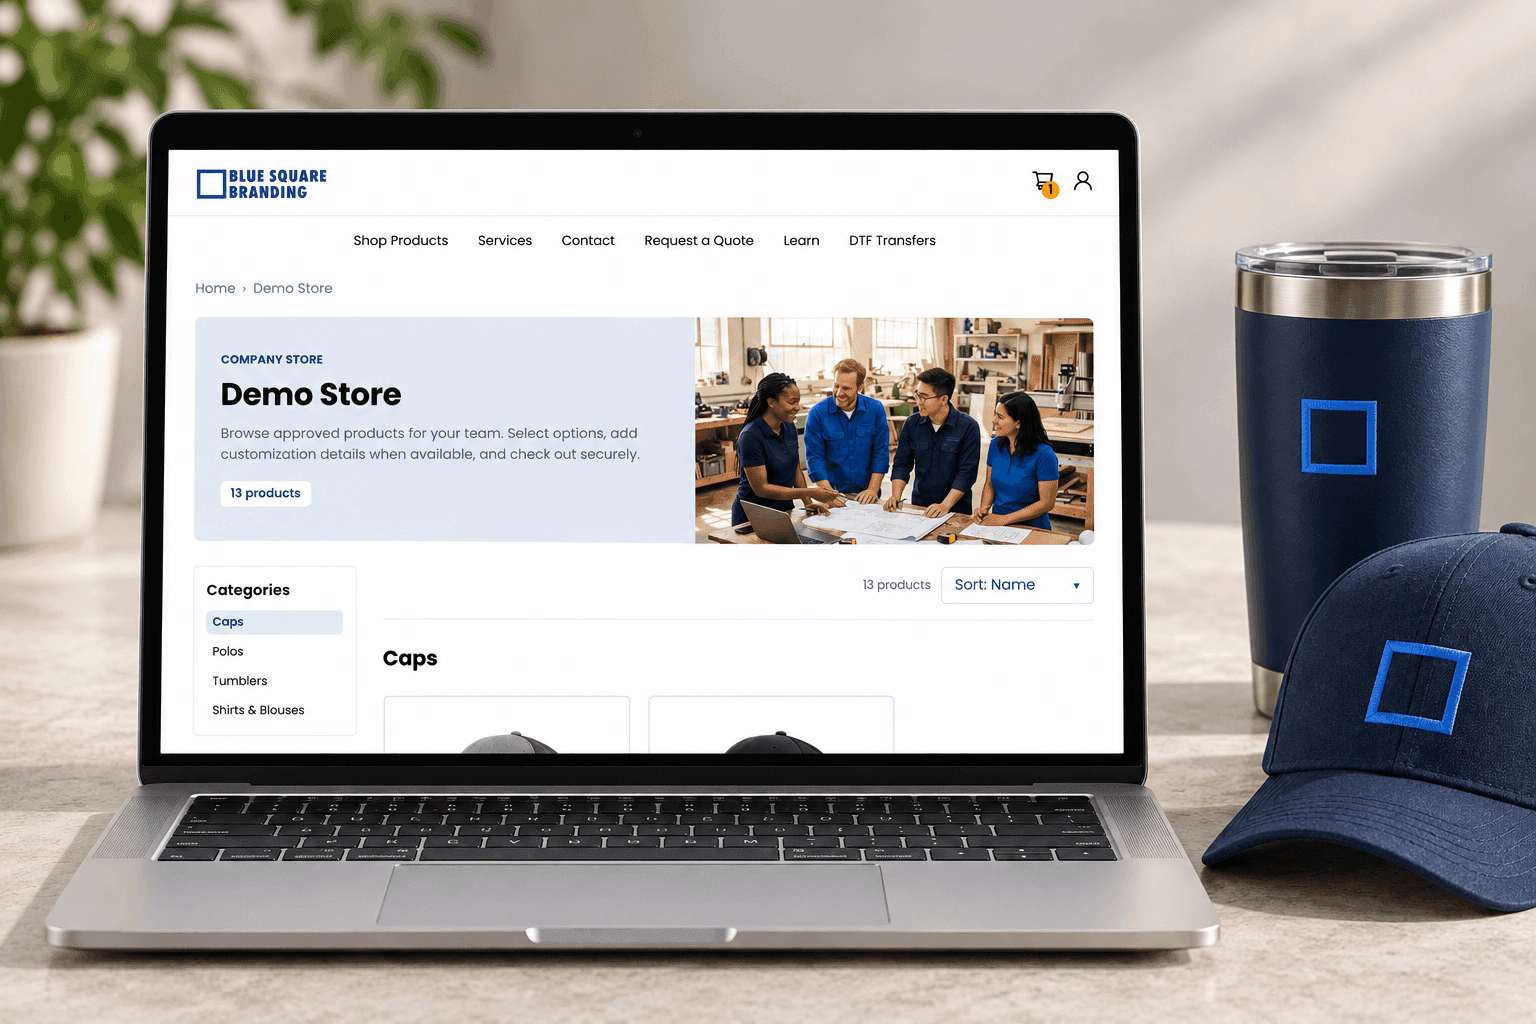
An online company store gives your organization a dedicated place to offer selected apparel and merchandise. Employees or members can browse approved products, review details, and choose available options without searching an entire supplier catalog.
But a useful store needs more than products and a checkout button. Before launching, you need to decide who can order, who pays, how orders reach shoppers, and where people can get help.
Here is how the process works and what to plan along the way.
1. Decide who the store is for
Start with the people who will use the store and the problem you want to solve.
Maybe an office manager is collecting shirt sizes through email. Employees across several locations might struggle to find the correct logo apparel. A club or membership organization may want one merchandise link to share with its members.
A clear purpose helps you choose the right products and explain the program to shoppers.
For example, a regional business could offer approved polos, jackets, and drinkware for employees. A club might offer a smaller collection of shirts and accessories for members.
Also discuss how people will access the store. Will you share the link publicly, send it directly to employees, or need access restrictions? Confirm the available setup rather than assuming an organization’s store is automatically private.
2. Build a collection people can understand
Start with a manageable selection that serves your audience. A store does not need dozens of similar products to be useful.
For each item, confirm:
- The garment or product being offered.
- The approved logo or design.
- Available sizes, colors, and other options.
- Any personalization shoppers can request.
- Product descriptions, images, and pricing.
Use clear category names and consistent language. If the launch email calls something an “employee polo,” shoppers should be able to recognize that item in the store.
Nielsen Norman Group’s guidance on consistency across channels explains how coherent information and familiar experiences help people move between different points of contact with a business. For a company store, that means your invitation email, storefront, and ordering instructions should tell the same story.
Review the actual product pages before launch. Make sure size charts match the garments, images represent the available options, and personalization instructions are easy to understand.
You can browse Blue Square Branding’s demo store to see an example of the shopping experience. Your organization’s collection and ordering arrangements would be confirmed separately.
3. Agree on how payment will work
Decide who pays before inviting people to order.
Some programs involve individuals purchasing their own merchandise. Others involve the organization purchasing items for its team. The arrangements available depend on the supplier and the specific program.
Work through these questions:
- Will individuals pay for their own orders?
- Will the organization purchase some or all of the merchandise?
- What charges will shoppers see before checkout?
- Who handles payment questions or incorrect orders?
- If you need allowances, approvals, payroll deductions, or special billing, can the proposed setup support them?
Those additional arrangements should be confirmed individually. They are not automatically included just because a website is described as a company store.
The U.S. Small Business Administration’s marketing and sales guidance recommends planning the purchasing process and accounting for costs. Apply that same discipline here: make sure both your organization and your shoppers understand how payment works.
4. Explain ordering and delivery clearly
Shoppers should know what to expect before they submit an order.
If the store has an ordering window, distinguish the closing date from production and delivery timing. “Order by Friday” does not tell someone when their shirt will arrive.
Confirm which delivery arrangements are available. Depending on the program, these could involve individual shipping, delivery to a central location, or pickup where offered.
If orders go to your office, identify who receives them and how employees will collect their items. If individual shipping is available, explain how shoppers enter their addresses and where shipping costs appear.
Personalization also needs clear instructions. A name or number should have an obvious place to enter it, with an example if the required format could be confusing.
The W3C Web Accessibility Initiative’s guidance on form labels explains why fields need descriptive labels that identify their purpose. That matters when shoppers are selecting options or supplying details that will appear on a finished product.
Finally, confirm how corrections, exchanges, and support requests will be handled. Decorated and personalized merchandise may have different policies from ordinary retail products, so publish the policy agreed for your program.
5. Review the store before launch
Ask someone who was not involved in setting up the store to try it.
Can they find a product, understand its options, and explain what will happen after they order? Their questions can reveal details that seem obvious to the project team but are unclear to a new shopper.
Use this launch checklist:
- Organization name and approved branding are correct.
- Product descriptions, images, prices, and options are accurate.
- Size information is available where needed.
- Required personalization fields are clearly labeled.
- Payment and delivery instructions match the agreed program.
- Support contact information is easy to find.
- The store works on a phone and with keyboard navigation.
- Order confirmation behavior has been checked through an agreed test process.
- Any demonstration mode prevents unintended purchases.
Include the work that happens after checkout in your review. Confirm who receives order information, who coordinates fulfillment, and who responds when someone needs help.
Once everything is ready, share the store with a short explanation of who it is for, what is available, any ordering deadline, and where shoppers can ask questions.
6. Keep the collection and information current
A company store needs an owner after launch.
Choose someone within your organization to coordinate questions and maintain contact with the supplier. Review the collection when products become unavailable, branding changes, or your team’s needs shift.
Pay attention to repeated questions. If shoppers regularly ask about sizing, shipping, or personalization, the store may need a clearer explanation.
Evaluate the program against the problem you wanted to solve. Useful measures could include time spent collecting orders, incomplete submissions, support questions, and employee feedback.
A store can give people a consistent place to order without automatically guaranteeing lower costs or faster fulfillment. Its value depends on the collection, ordering arrangements, and ongoing coordination.
Blue Square Branding helps organizations plan branded merchandise collections and online company stores. Bring your audience, product ideas, and preferred launch date to the conversation so the available options can be discussed.
Start with a clear purpose, confirm the details before launch, and keep the experience easy for the people using it.
Sources
- Manage your business — Marketing and sales, U.S. Small Business Administration
- Consistency in the Omnichannel Experience, Nielsen Norman Group
- Labeling Controls, W3C Web Accessibility Initiative